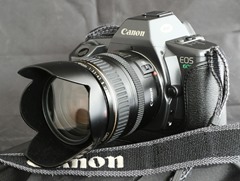
Well as luck would have it just a week before we go away on holiday I decide to check out my Canon EOS 600 only to discover that the battery was dead Jim… I had checked the control dial and it was in the “Lock” position. Putting the battery on my multimeter showed that it had dropped to just over 3 volts. I had only just put in a new battery a month ago and it had all of its “juice” drained like it had been a victim of a vampire!
Beware the vampire the “silent” battery killer!
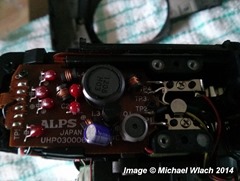
Doing some research on Google I learnt that the issue of battery drain on older Canon EOS film cameras is mainly due to one of the capacitors on the backlight pcb “drying” out and acting like a resistor and drawing power even when the backlight and camera control were set to off turning the camera into a battery draining vampire!
Thanks to Jason Knight (http://www.jayknightlife.com/2014/01/fixing-canon-eos-630s-batter-drain.html) and
Popular Photo Forum (http://forums.popphoto.com/showthread.php?598412-Anyone-care-for-some-repair-tips-regarding-the-Canon-EOS-630-EOS-RT) I was able to perform delicate surgery on the camera’s innards to disconnect the backlight from the pcb.
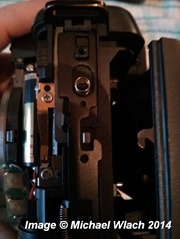
While most of the operation was straightforward I did run into the issue of several parts of the door latch assembly coming loose when the side panel is removed. As some of the photos in the articles above were slightly blurred I took some more detailed pictures showing how the assembly goes together.
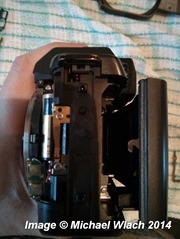 Fig 1. Latch assembly with all parts removed.
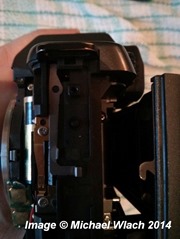 Fig 2. The metal plate goes here.
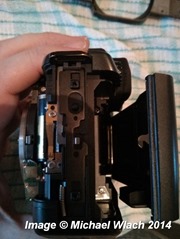 Fig 3. Next attach the latch slider and spring.
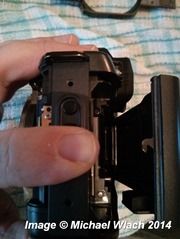 Fig 5. Add the latch cover along with button and hold in position.
Once the panel was reassembled I noticed that the door doesn’t close without pressing on the latch release button. I can’t recall if this was by design but at least it holds the rear door securely protecting the film inside.
Addendum
Most articles about this issue go through this “tear down” process however it is not really necessary. Providing you are careful you can get away with just removing the screws in the base of the camera and with a bit of very gentle persuasion remove the camera base cover.
If you have followed one of the other guides and found yourself looking at several parts that just “fell off” from the latch mechanism hopefully the pictures above will help you to put it back together again.
RIP EOS 600 I hardly new ye
Sadly a day later armed with a fresh battery I tested out this particular fix to no avail. Whatever happened after the first battery was removed had left the camera in a completely dead state, with no power whatsoever. It was dead, bereft of life, ceased to be, it was an ex-Canon EOS 600..!
Always Look On The Bright Side Of Life
With only days to go I needed another camera body so I bought a used Canon EOS 650 body (their first autofocus model, the 600 came later) for the princely sum of £25 with a fiver for postage. I’ve tested it briefly and it appears to be working so I’ll report my findings in a few weeks time!
